Workflow Builder
The Workflow Builder is a visual, node-based editor for scripted call flows. Where the open-ended agent lets the model decide what to say next, a workflow gives the agent a deterministic path — a sequence of steps that speak, ask, branch, call tools and route the conversation. Use it when a call needs to follow a defined script: qualifying a lead, booking an appointment, triaging a support issue or collecting a survey. You open it from the Tools tab in the agent builder at /agent/setup, using the Open Workflow Builder button.
A workflow belongs to a single agent. At call time a supervisor watches the conversation, decides which intent the caller is expressing, and runs that intent's steps in order. The functions the agent can use inside steps are exactly the ones you've bound on the Tools tab — the workflow can't reach a tool you haven't granted.
How a workflow is structured
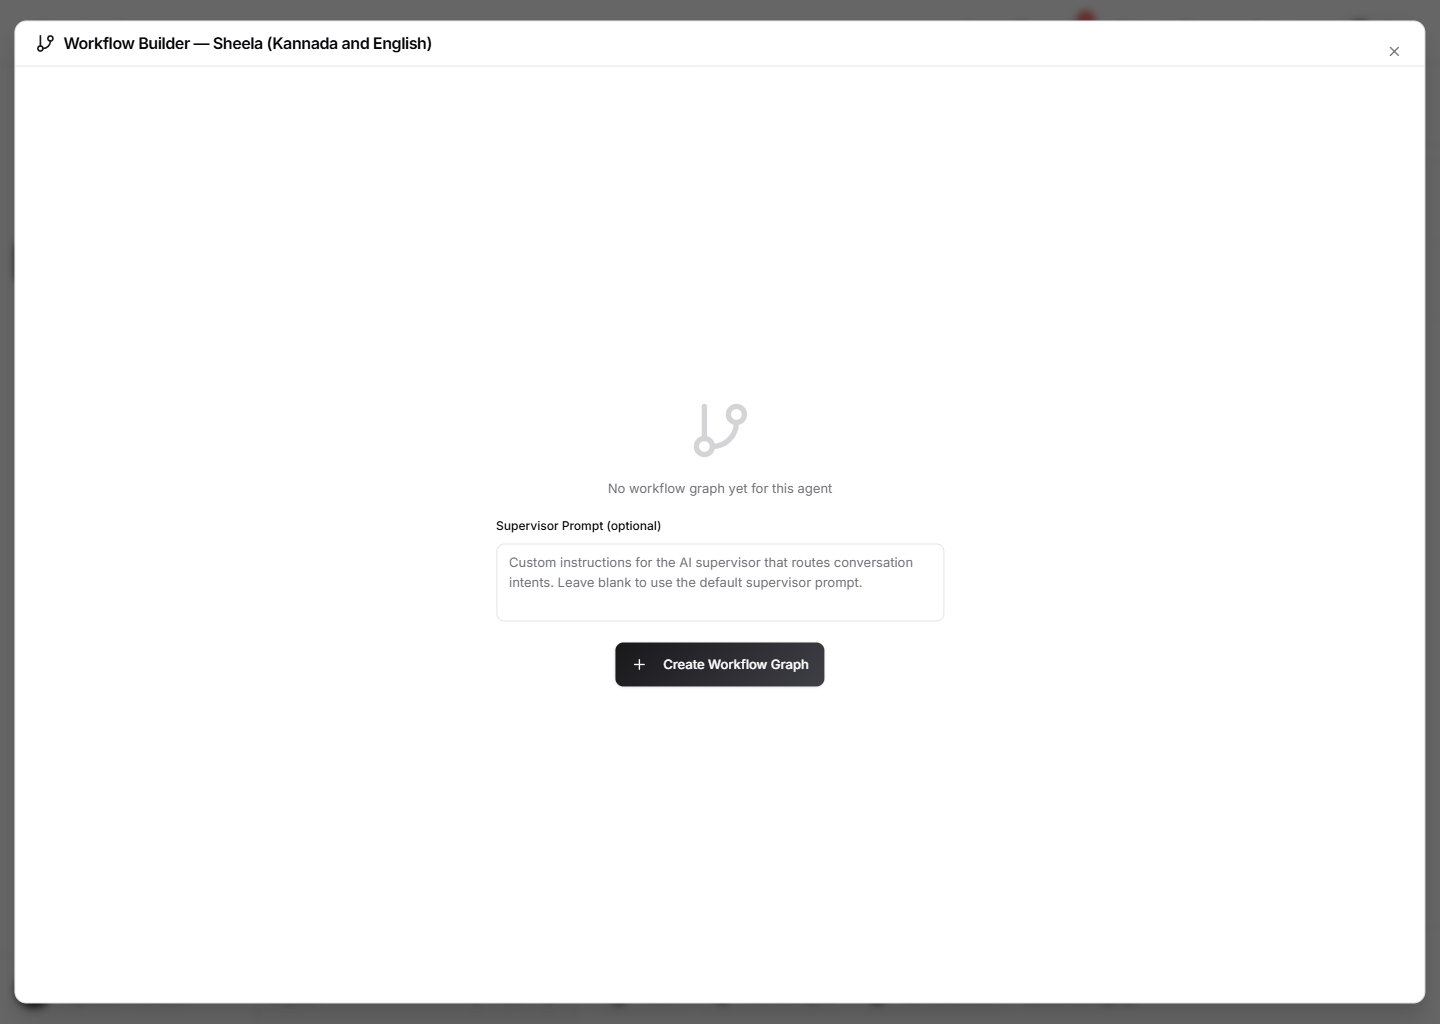 The Workflow Builder: design deterministic call flows on an n8n-style node canvas, with an optional supervisor prompt.
A workflow has three nested levels:
- Graph — one workflow per agent. It carries an optional supervisor prompt (custom instructions for the AI supervisor that routes intents). Until you create the graph, the builder shows a one-time Create Workflow Graph screen with the supervisor-prompt field.
- Intents — the branches of the conversation. Each intent has a display name, an internal name, a description (shown to the supervisor model so it can match the intent), a list of trigger phrases, a default intent toggle, and an optional fallback response used if all of its steps fail. The supervisor picks the intent whose description and trigger phrases best fit what the caller said.
- Steps — the ordered actions inside an intent. Steps run top to bottom by default, and each step has a type that decides what it does.
On the canvas this reads as a green Start node flowing into one Intent node per branch, with that intent's Step nodes stacked beneath it. A minimap, zoom controls and a dotted background help you navigate larger flows.
The supervisor matches the caller's utterance against each intent's description and trigger phrases, so write descriptions the way you'd brief a colleague ("User wants to book or schedule an appointment") and add a few natural trigger phrases. Mark one intent as the default to catch conversations that don't clearly match anything else.
Step types
Add a step with Add Step (after selecting an intent or one of its steps), which opens the node picker. The picker groups the step types into Conversation, Logic, Integrations and Call Control. There are thirteen types:
- Message — the bot speaks a line to the caller.
- Question — the bot asks something and stores the answer in a variable. You choose a validation type (Any, Number, Email, Date, Yes / No or Phone) and a re-ask message used when the answer fails validation.
- Condition — branches the flow. You pick a field (a session variable), an operator (equals, not equals, contains, does not contain, greater than, less than, matches regex, is empty, is not empty) and a value, then route If True and If False to specific steps.
- Tool Call — calls a built-in or custom function bound to the agent. You select the tool type, the function, and an optional input mapping (JSON) that maps step inputs to session variables.
- Appointment — runs an appointment-booking sub-flow against a booking function, with its own input mapping.
- Webhook — makes an HTTP request to an external URL. You set the method (GET, POST, PUT, PATCH, DELETE), the URL, optional headers (JSON), a body template, and a variable to save the response into.
- Transfer — hands the call off to another phone number or queue, with an optional message announced before the transfer. See Calling & telephony for how call transfers behave end to end.
- End Call — hangs up, optionally speaking a goodbye message first.
- Delay — waits silently for a set number of seconds (1–60) before continuing.
- Set Variable — stores a value (static text or a reference to another variable) into a session variable.
- Send Notification — sends an SMS, email or WhatsApp message using a named template and a variable mapping (JSON).
- Static Response — speaks a fixed block of text. This is a legacy node; prefer Message for new flows.
- Play Audio — plays an audio file (a public WAV or MP3 URL) to the caller.
Each step is configured in the right-hand panel that opens when you select a node. The panel shows only the fields relevant to that step's type, plus the step's name and a type selector.
A Question or Set Variable step stores its result under a name you choose. Reference it later — in a Message, a Condition's field, a Webhook body or a notification mapping — with curly-brace syntax like {variable_name}. This is how a flow remembers what the caller said and carries it forward across steps.
Branching and routing
Steps don't have to run in a straight line:
- A Condition step exposes True and False outputs. Wire each to a target step (or leave it on Continue in order) to branch on a variable's value.
- Every other step type has On Success and On Failure routing. By default a step continues to the next one in order; set these to jump elsewhere — for example, route a failed Tool Call to a recovery message.
You can set routing two ways: pick the target step in the config panel, or drag a connection on the canvas from a step's output handle (the green OK / TRUE handle or the red FAIL / FALSE handle) to another step. Connections drawn on the canvas are saved to the workflow immediately.
Building and saving
The builder persists changes as you make them rather than in one big save:
- Add Intent creates a new branch; click it to fill in its name, description and trigger phrases, then Save Changes in the panel.
- Add Step inserts a step of the type you pick; configure it in the panel and Save Changes.
- The up / down chevrons on a node reorder intents and steps; deleting a node (via its trash icon or the Delete key) asks for confirmation first.
- The toolbar Save button stores the supervisor prompt; an amber dot marks unsaved prompt edits.
Start from a template
Rather than building from scratch, the Templates button offers ready-made flows you can load and then edit: Lead Qualification, Appointment Booking, Customer Support, NPS Survey, Payment Reminder and Customer Onboarding. Each drops in a complete intent with its steps, including questions, conditions and goodbye messages. Applying a template adds to your existing workflow rather than replacing it, so you can combine several or trim what you don't need.
Import functions from an OpenAPI spec
The Import API button turns an existing API into agent functions you can call from Tool Call steps. Provide an OpenAPI / Swagger spec — by URL or by pasting it (OpenAPI 2.0 or 3.x, JSON or YAML) — and the importer parses the operations. Pick the operations you want, confirm the base URL, and it generates custom functions for them. Those functions then appear in the function list for Tool Call steps and on the Tools tab.
A Tool Call step can only use functions already available to the agent — the built-in functions and any custom functions bound on the Tools tab, including ones generated by the OpenAPI importer. If the function you want isn't listed, add it on the Tools tab first.