Create your first agent
This is the end-to-end path for building an AI voice agent: create it, configure the builder tabs, test it in voice and chat, then publish. Each tab has its own deep-dive page — this one ties them together in the order you'll actually work through them.
Before you start
- You need an account with permission to build agents — an org_admin or a project_manager for the project. See roles.
- Decide which project the agent belongs to, since the project sets the timezone and locale. See Projects.
Step 1 — Create the agent
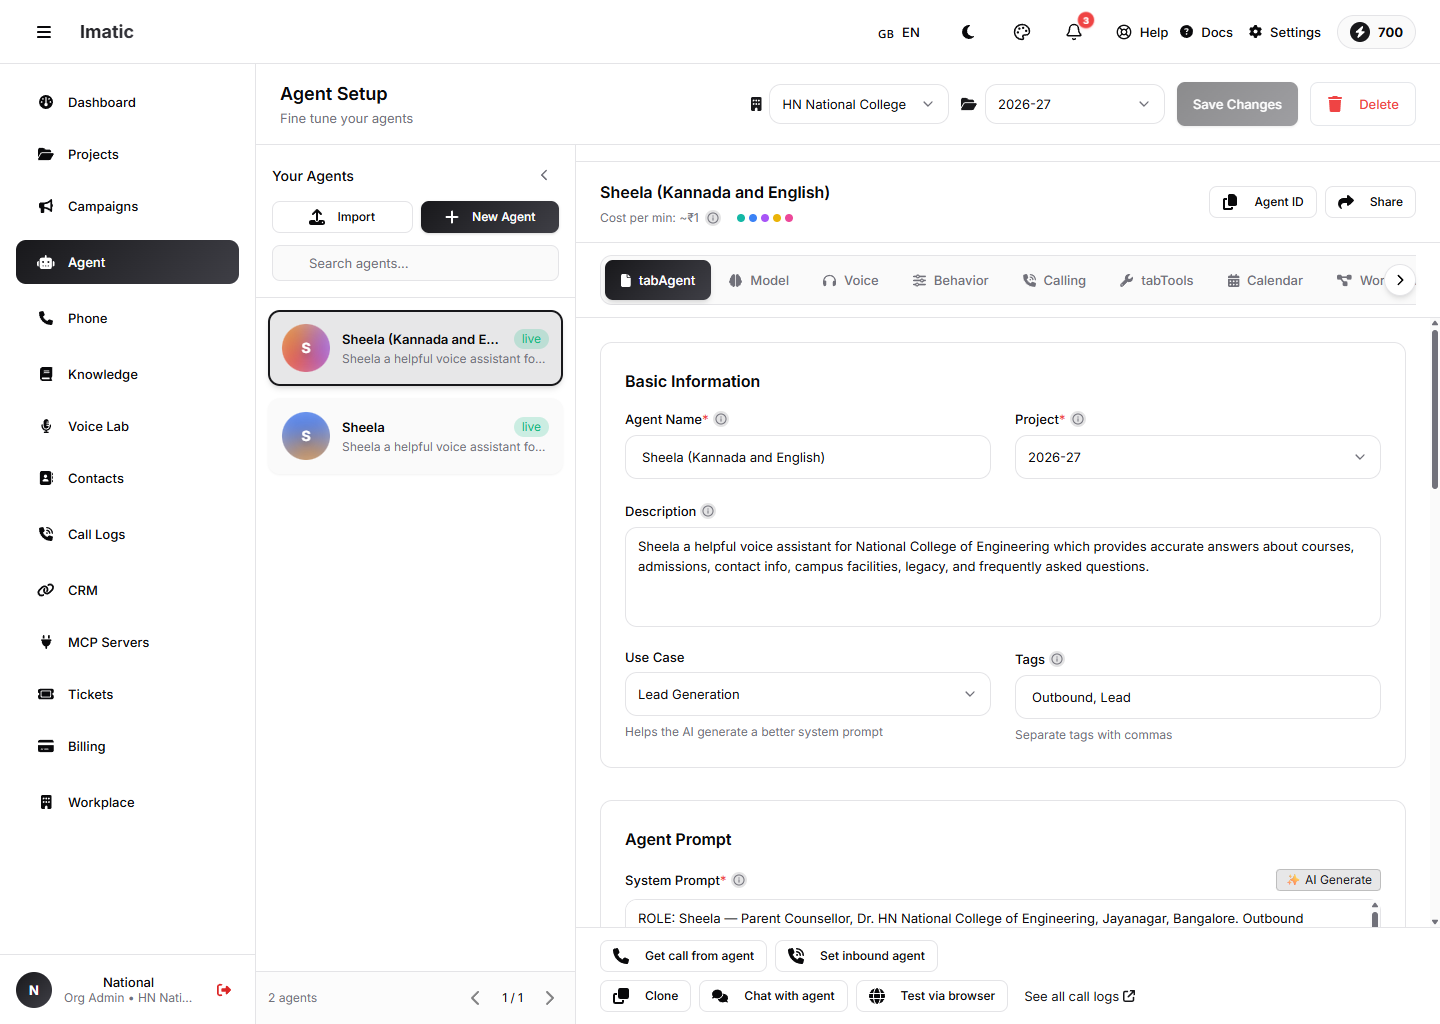 The Agent tab: name, project, description, system prompt and the live prompt-strength analysis.
Open the agent builder at /agent/setup and start on the Agent tab. This is where the agent's identity and the words it says live.
- Give the agent a clear name.
- Add a short description of what it does.
- Choose the use case that matches your goal.
- Pick a template to start from, if one fits — templates pre-fill sensible settings you can change later.
- Write the system prompt — the core instruction set that defines who the agent is and what it must do.
- Set the greeting (the first line when a call connects) and the end, fallback, busy and voicemail messages.
Save to create the agent. You can now move through the rest of the tabs.
The system prompt, greeting and key messages are all on the Agent tab — not the Engine tab. The Engine tab tunes pacing (interruptions, silence, filler words), not what the agent says.
Step 2 — Configure the core tabs
Work down the tabs, saving as you go. You don't need every tab for a first version — the four below are the essentials.
Language model
On the LLM tab (labeled Model in the builder), first choose the voice pipeline mode (it drives the whole call), then pick the LLM provider and model, set temperature, token limits and a fallback model. This decides how the agent reasons and how consistent it sounds.
Voice and audio
On the Voice & audio tab, choose how the agent listens and speaks: pick a speech-to-text provider and model and a text-to-speech provider, model and voice, then tune the provider-specific controls.
Conversation behavior
On the Engine tab, tune pacing: barge-in and interrupt handling, voice-activity-detection padding, response delay, silence handling and filler words. The system prompt, greeting and messages are set back on the Agent tab.
Calling
On the Calling tab, set inbound and outbound use, maximum call duration, auto-hangup, assigned numbers and webhooks. (Call transfer is configured separately, via the Tools → Workflow "Transfer Call" function.)
Step 3 — Add knowledge and tools (optional)
Once the basics sound right, make the agent more capable:
- Knowledge & RAG — on the LLM tab, turn on RAG, link a knowledge base so the agent answers from your own documents, and tune similarity and top-k.
- Tools & MCP — give the agent functions, connect MCP servers, and design call flows in the Workflow Builder so it can take real actions during a call.
Build in layers. Get the voice and greeting right first, confirm it in a test, then add knowledge and tools. It's much easier to tell what changed when you add one capability at a time.
Step 4 — Test the agent
Try the agent before it touches real calls. The Portal gives you two test surfaces:
- Voice test at /agent/interface — talk to the agent and hear it respond with the voice and behavior you configured.
- Chat test at /agent/chat — exchange text turns to check the prompt and logic quickly, without using voice.
Iterate: adjust a tab, save, and test again until it sounds and behaves the way you want.
Step 5 — Publish and put the agent to work
When the agent passes your tests, publish it. Publishing isn't a separate flow — on the Agent tab, turn on the Published toggle (and make sure the Active toggle is on too). A published, active agent is ready to be used on real calls. From there:
- point a campaign at it to run outbound calls, or
- assign it to handle inbound calls (see Calling & telephony).
Every call the agent handles is recorded and analyzed in Call logs & analytics, where you'll find the recording, transcript, AI summary and sentiment to guide your next round of tuning.